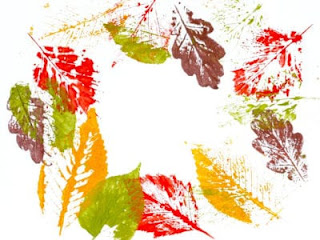
Printing with leaves, flowers, and other found objects allows you to create decorative patterns and works of art that capture the beauty of nature.
You can make beautiful stationery, cards, wrapping paper, and other artwork by printing with leaves and other found objects from nature. Water-soluble printing inks work well, but almost any ink or paint can be used for nature printing, so try whatever product you like working with. Begin with flat leaves, such as sage, maple, hydrangea, and dandelion. Leaves with interesting shapes and protruding veins give satisfying results. Try printing with leaves on as many papers as possible to find your favourites, but begin with newsprint, Kozo, copier paper, and other inexpensive, smooth-textured papers for practice.
Printing with Leaves
TOOLS AND MATERIALS
- Water-soluble inks
- Glass or freezer-paper palette
- Vehicle or extender (mixing medium for the ink)
- Pigment mixers
- Dabbers (pads) and/or brayers (rollers)
- Leaves and other natural objects to print
- Tweezers
- Newsprint for test prints
- Newsprint or paper towel cover sheets
- Papers for printing
Step 1. PREPARE THE INK AND PALETTE.
Put a small amount of ink onto your palette. If desired, add a few drops of mixing medium or water and mix together. Use the mixer to drag some of the ink along the palette, making a thin smear a few inches long.
Step 2. PREPARE THE DABBER.
Pick up a dabber by the narrow end and dab the wide end, up and down, in the ink smear. You don’t want globs
of ink on your dabber, just a nice even film. Test this by pressing the dabber, using medium pressure, on a piece of newsprint. Ideally, a little square of evenly distributed ink will appear. Use a clean dabber for each colour.
Step 3. INK THE LEAF.
Place a leaf, underside up, on the palette or on a piece of scrap paper. Hold the stem end of the leaf with your finger and dab ink over the entire surface. Don’t saturate the leaf with ink or the veining pattern won’t print clearly.
Step 4. PRINT THE LEAF.
Pick up the leaf by the stem end with tweezers and place it inked side down on newsprint or other test paper.
Place a cover sheet over it and press the entire leaf with your fingers or the heel of one hand. For large leaves use both hands; anchor the centre of the leaf with the thumb of one hand while using the other hand to successively press all around, radiating from the centre to the edge of the leaf.
Remove the cover sheet, then lift the leaf straight up and off the paper with clean tweezers.
Step 5. CHECK THE RESULTS.
If the leaf print looks heavy, with little detail, use less ink or less pressure. If the leaf looks pale, with spotty detail, use more ink or more pressure when printing. Always make test prints. With the exception of delicate flowers, the first print is rarely the best one.
Step 6. MAKE MORE PRINTS!
Depending on the sturdiness of the leaf, one leaf might make 5, 10, or sometimes 40 impressions. One inking can make two or more prints, each one lighter than the last. Once you’re satisfied with your test prints, move on to using good-quality papers. Print a variety of leaves, flowers, and other objects; use more colours, and print on fabrics and other surfaces.
https://www.storey.com/article/printing-leaves-natural-objects/


.jpg)
.jpg)