Glass Painting

Looking for a new, creative craft? You may want to try glass painting. Much simpler than stained glass, glass painting creates an equally beautiful piece of artwork. It can look fairly similar to stained glass yet it has its own original style. It’s an excellent craft for people of all ages and can be as challenging or as simple as you like. The process that I’m going to be demonstrating is a two-day process, including the drying time. Depending on what you are going to be doing it can take anywhere from ten minutes to five hours each day.
Step 2: Chose Your Pattern

Choosing your pattern is a crucial part of doing this craft and will define what your final product will look like. It may involve drawing your own pattern if you’re artistic. Or if you're not very confident in your own drawing skills there are books full of stained glass patterns you can get, and of course, there’s always the Internet.
For my paintings, I’m going to be using some dragon pictures that I've printed off from the Internet.
Step 3: Choosing Your Glass
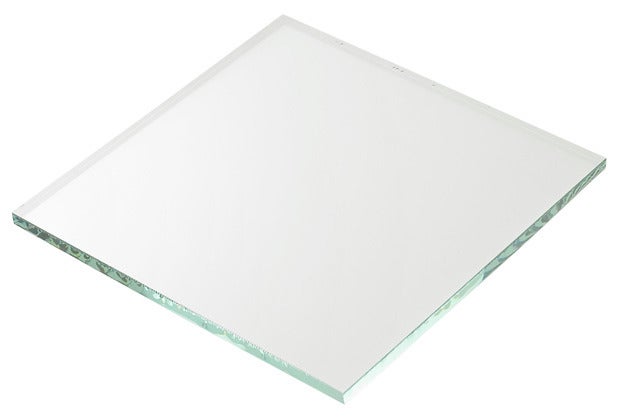
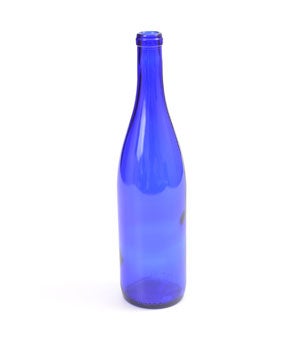
There are a wide variety of options that you can use for your glass. You can use a simple flat sheet, a wine bottle, a windowpane, a glass pan, etc. You can also get glass in numerous different colours and textures.
For my project, I'm actually going to paint it on a piece of Cling Wrap and later peel it off and glue it onto one of my windows.
Step 4: Draw Your Outline


This stage requires several different steps. You will need your pattern, glass/Cling Wrap, and glass liquid leading for it.
4.1. First you slide your pattern underneath the glass sheet. (Or if you're feeling more ambitious you can freehand it)
4.2. Then take the cap off of your liquid leading and squeeze out a little bit to make sure that there are no clogs.
4.3. Use the liquid leading to trace the outline of your pattern.
4.4. Then place the sheet of glass somewhere safe and let it dry for at least twelve hours.
Note: if you smear the leading accidentally it can be easily removed with a paper towel or napkin granted that you catch it before it starts to dry.
For my project, I'm making several small drawings on Cling Wrap and will later combine them into a picture.
Step 5: Choosing Your Colors

This is an important step because it will decide the final colour of your picture. Glass paint comes in a wide variety of colours and shades. Everything from prime colours to clear paint that matches your glass to sparkly and cloudy colours.
You will also want to make sure that the colour you choose is actually the right colour. The colours look much different when in the bottle than on glass. You may want to make a palette of the colours you're going to use to make sure that they're the right shade. Just dry a little dot of each colour on a piece of glass to use as a reference.
Step 6: Filling in the Picture


This is probably the funniest stage of the process. You can really use your creativity. It will require the use of your glass paints and toothpicks.
6.1. Take out the now dried outline.
6.2. Bring out your colours.
6.3. Squeeze your colours into the appropriate spots using the outline like the lines on a colouring page.
6.4. Spread it around using the toothpicks. (Small bubbles may form in the paint and you can use the dry end of a toothpick to pop them.)
6.5. When you have finished filling in everything leave it to dry for another twelve hours.
Note: Make sure to fill in everything on the piece of glass even if it’s just with clear paint. That way everything will be at the same level.
If you’re feeling ambitious you can experiment with mixing and swirling various colours. It can produce some beautiful results.
Step 7: Combining Your Work (Optional)


This step is optional depending on what you have chosen to do. For my project, I'm going to combine three of the dragons that I drew into another drawing. Note that this can only be done if you do your work on Cling Wrap because then you can peel the paintings off.
7.1. First peel your pictures off of the Cling Wrap.
7.2. Arrange them like you want on a clean sheet of Cling Wrap or on a piece of glass.
7.3. Use your liquid leading to connect your pictures. (make sure to overlap it with the pictures you already drew so that they will stick together)
7.3. If you want to you can fill in the new outline after it has dried with your glass paints.
In my painting I am drawing a whole new picture around my work, however, there are endless options to what you can do so feel free to be creative.
Step 8: Hanging Your Work With Suction Cups


After you have finished all of the painting and let it dry completely you may wish to hang up your artwork. There are multiple ways for you to do this. If you drew your painting on a sheet of glass there is an easy way to do it using suction cups.
8.1. Put a dot of glass glue on each corner of your glass.
8.2. Stick on your suction cups and let them dry for the allotted amount of time.
8.3. Press your picture onto a window.
8.4. Enjoy the view!
Note: If you use suction cups you may want to paint the corners of your picture a darker colour otherwise you'll be able to see them through the glass.
Step 9: Glueing Your Work


If you did your painting on a piece of Cling Wrap there are a couple of different options for hanging it. First, you can glue your painting onto a sheet of glass using good glass glue and then hang it with suction cups as seen in step 8. You can also glue it straight onto your window. There are a couple of steps to do this.
9.1. First clean your window thoroughly so that the light can shine through to its greatest effect.
9.2. Peal your painting off of the Cling Wrap.
9.3. Spread a thin layer of glass glue over the back of your painting.
9.4. Press it onto the correct place in your window and let it dry.
Note: If you can it might be easier to take out your window and glue your painting on it when it's flat so that it doesn't slide at all.
Step 10: Admire Your Work

Now that you have finally finished you can step back and admire what you've created. With the sunlight shining through them glass paintings can be quite stunning.
As you can see from all of the images glass painting is an original and beautiful craft. It isn’t overly difficult, the main steps being drawing the outline and filling it in, and granted that you have a little bit of patience it can produce some beautiful results. It is an excellent way to show off your creativity and create a unique decoration for your home.
Hopefully, you now have a good understanding of how to glass paint. It is a very flexible craft and there are lots of different options to explore. I want to thank you for taking the time to read this. Now go have some fun and be creative!
Source : https://www.instructables.com/