Create DIY Christmas apothecary jars to hold holiday candy using dollar store supplies! This holiday craft is easy and budget-friendly.
Skills Required: Beginner. You should be familiar with a paintbrush since you’ll be doing quite a bit of painting. You’ll also be glueing. It’s relatively simple, you’ll just need patience during the drying time.
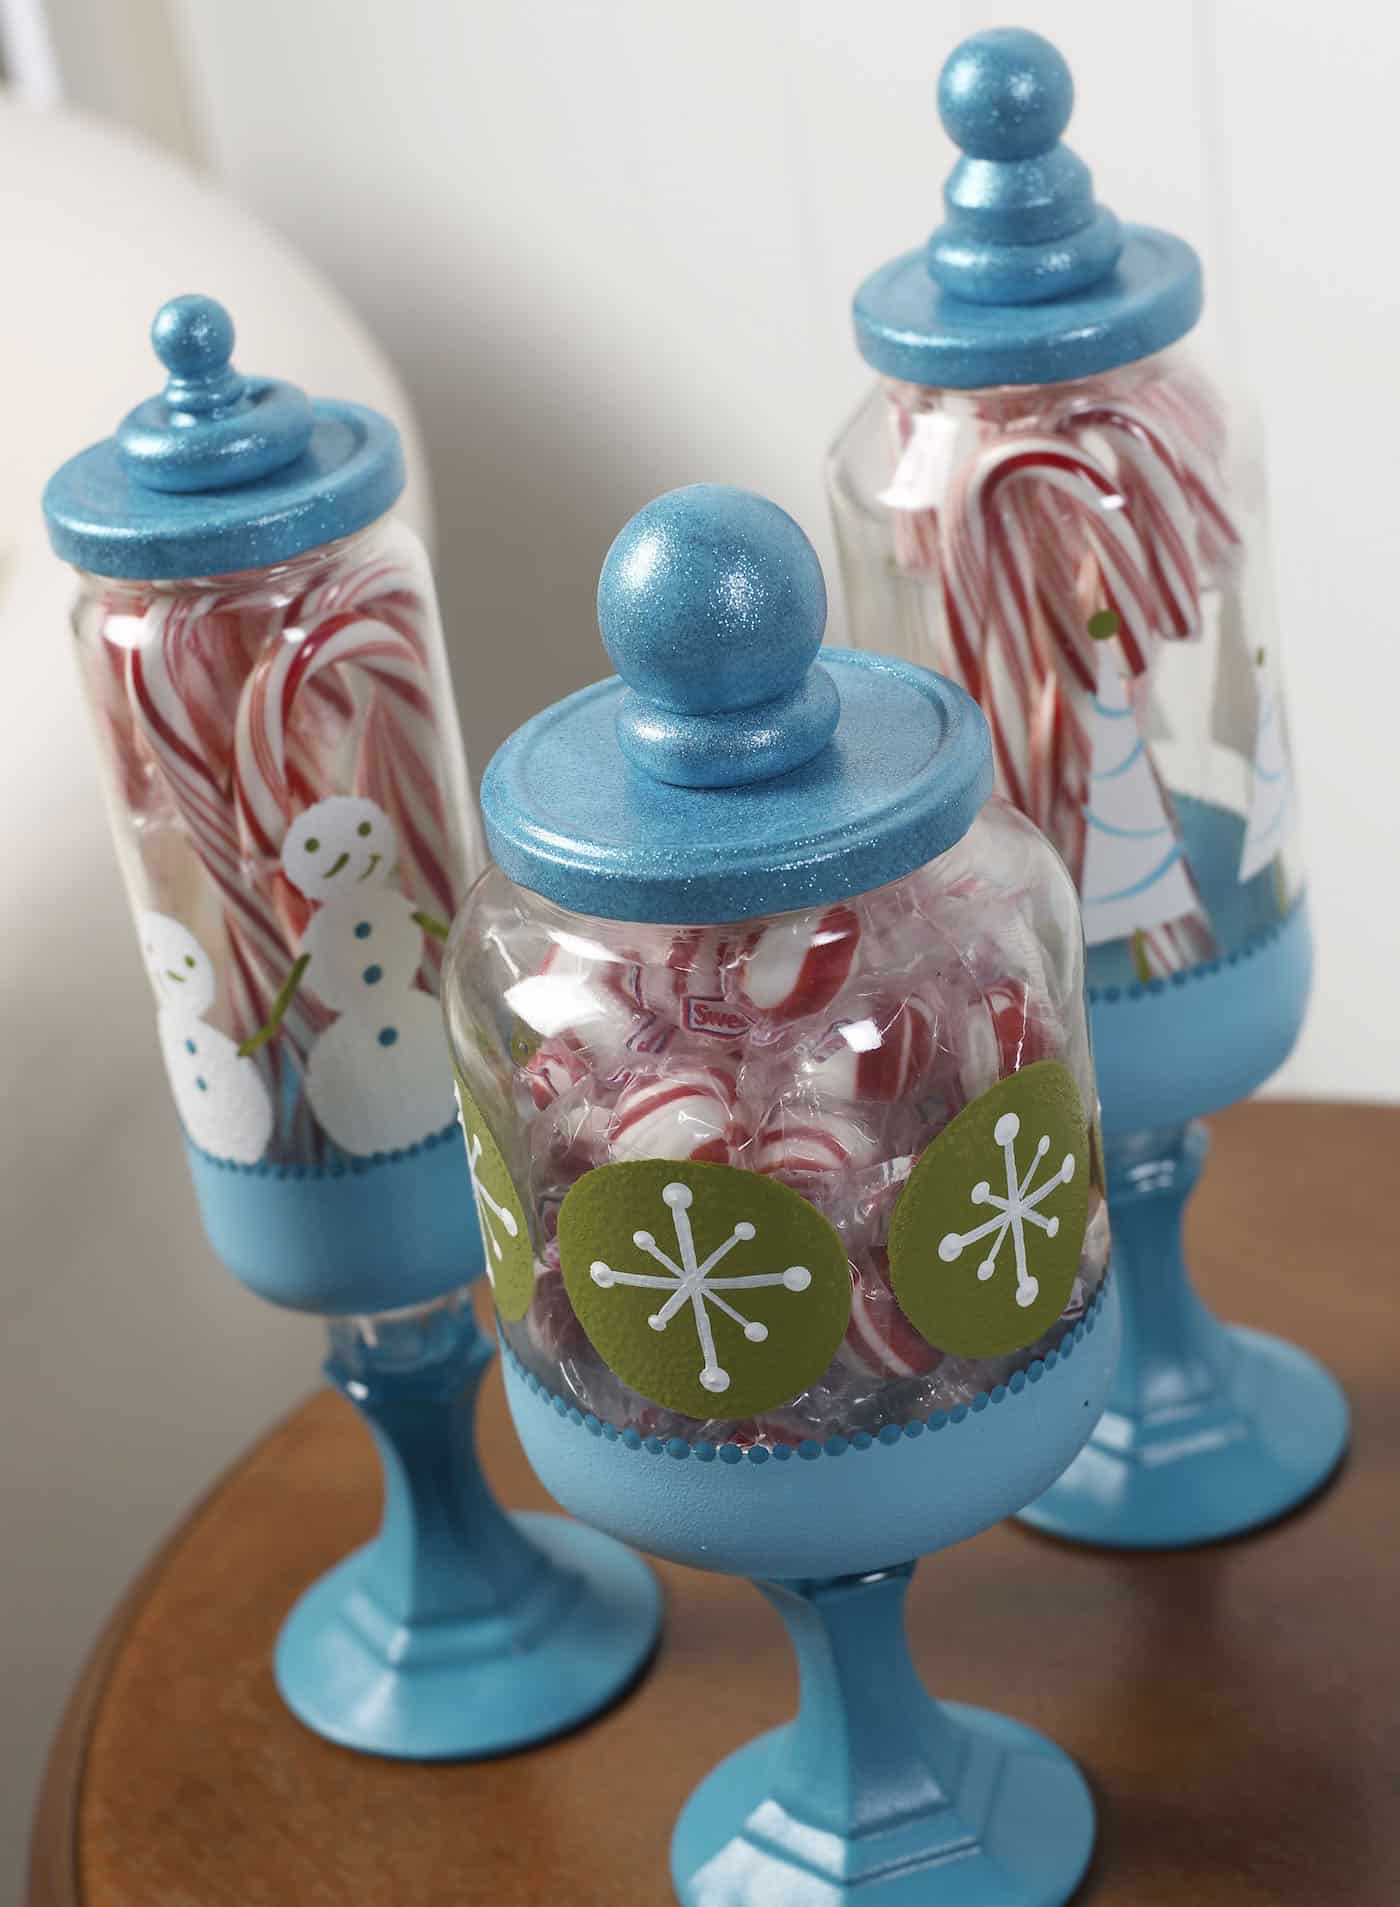
These glass Christmas apothecary jars are pretty cool. I have a secret actually . . . they aren’t “true” apothecary jars – they are dollar store and recycled items married together for a beautiful, functional accent to your seasonal decor.
These jars make great Christmas table decorations as well as something to place in the entryway for guests to grab a few holiday sweets as they are coming or going. And – they’re easy to make!
DIY Apothecary Jars
Sure, you can buy apothecary jars at the craft store or Target, but I’ll be honest – they aren’t cheap. If you purchase at the craft store, be sure to use your app and a coupon.
BUT If you like saving money, I have a better way to make these Christmas candy jars. DIY them with recycled jars and candlesticks. It’s my favourite secret for making a jar display like this one.
It’s also kind of fun to use various styles of candlesticks and mason jars for somewhat of a random look. I love it for the holidays!
All you’re going to need to do for this unique Christmas craft is paint and glue some stuff. It doesn’t sound that hard, now does it? It’s not. These look a lot more complicated than they are! Learn how to make them below.
Christmas Candy Jars
Gather These Supplies
- FolkArt Enamels Paint – Aqua, Calypso Sky, Forest Moss, Wicker White
- FolkArt Acrylic Paint – Calypso Sky
- FolkArt Extreme Glitter – Turquoise
- stencil tape
- foam sponsors
- Craft glue
- E-6000
- flat brush
- 1 Liner brush
- Assorted wood knobs/balls/wagon wheels
- Glass candlesticks – Dollar Tree
- Glass jars w/lids (recycled) – labels removed and jars thoroughly washed
Instructions
I have a great post on painting glass over at Mod Podge Rocks so be sure to go see it!
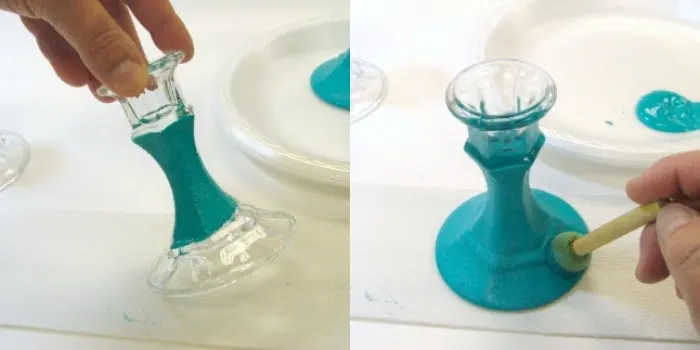
Apply Aqua enamels paint with spencer to your glass candlesticks. Only apply up to the decorative trim at the top of the candlestick. Set aside to dry.
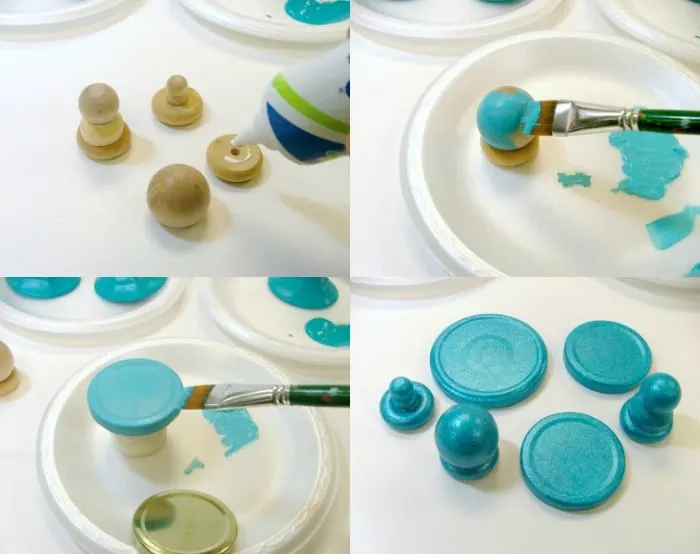
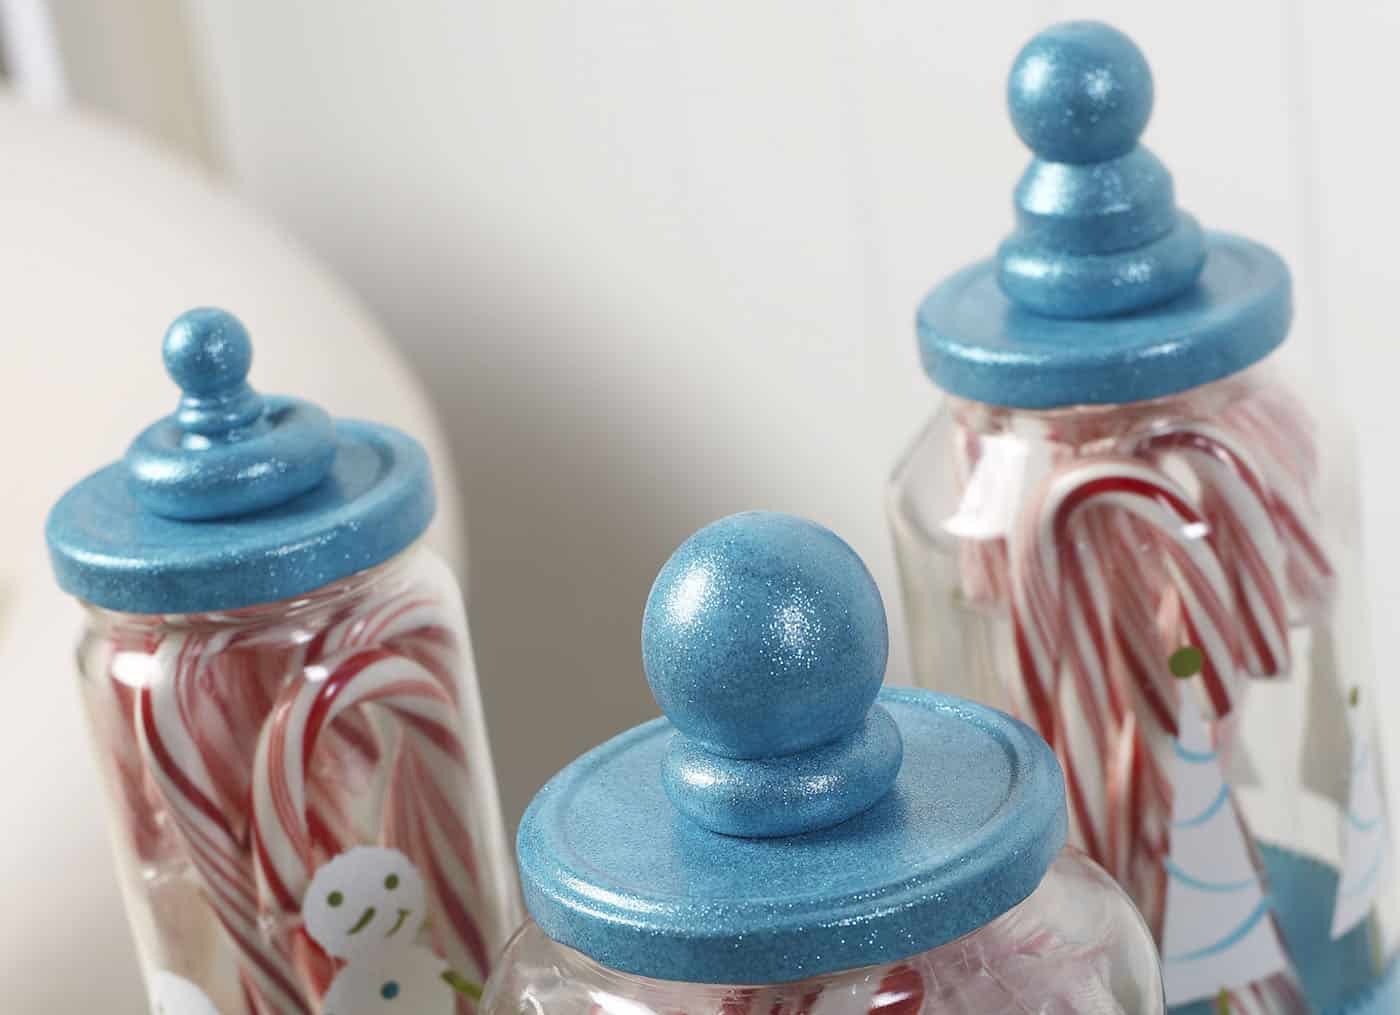
Glue your assorted wood pieces together to create three distinct finials.
Paint your finials and your three lids to the glass jars with Calypso Sky acrylic paint. Let the lids dry thoroughly between coats.
Apply several coats of Turquoise Extreme Glitter Paint to lids and finials. They look pretty glittery and rich when dry . . . set aside while you paint your jars.
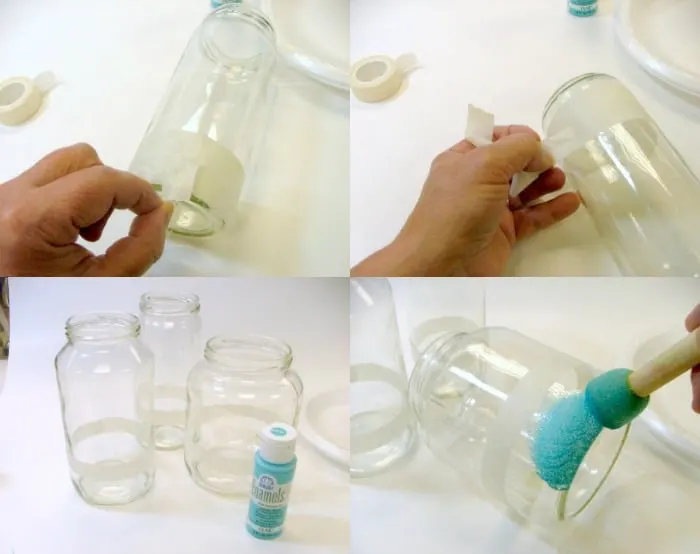
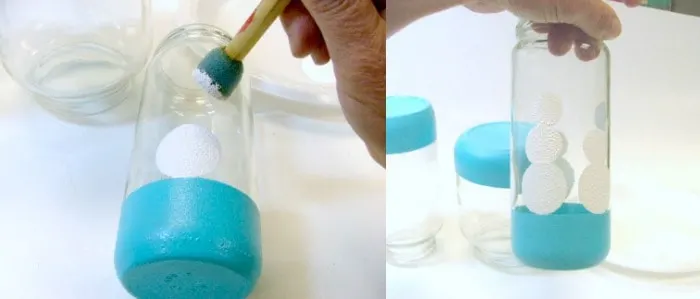
Wrap two rows of ¾” tape at the bottom of each jar. Remove the bottom row and wrap it above the top row. Remove tape below your topmost row and this is the area you will apply paint to. So basically, you are using the tape to help you measure 1.5″ up the jar evenly.
Apply several coats of Calypso Sky enamels paint with spencer. Remove tape before the paint dries to prevent pull up.
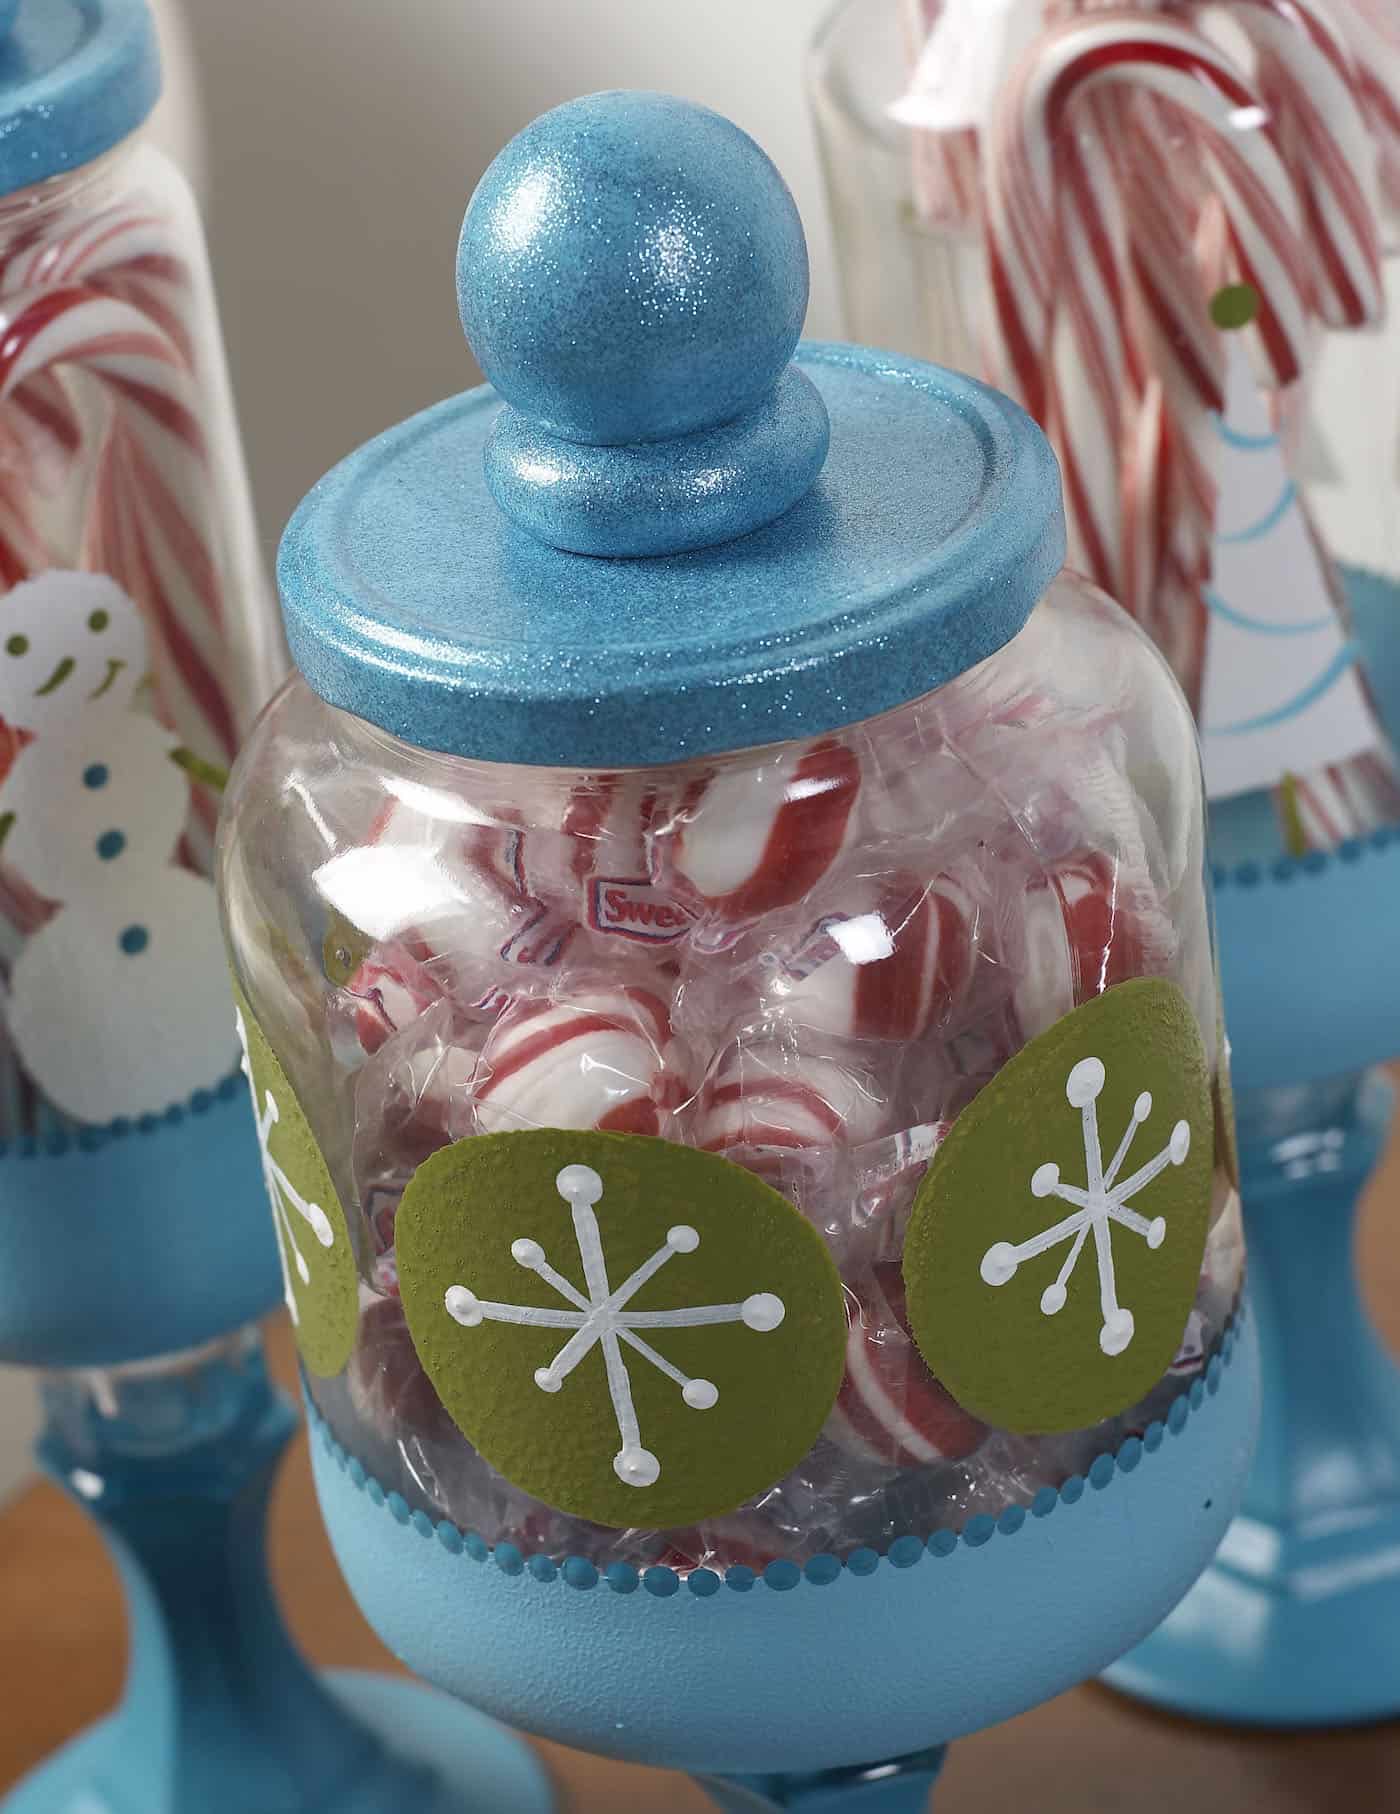
Each of your DIY apothecary jars is going to have a different design. On the first jar, create snowmen around with assorted spencer sizes in Wicker White.
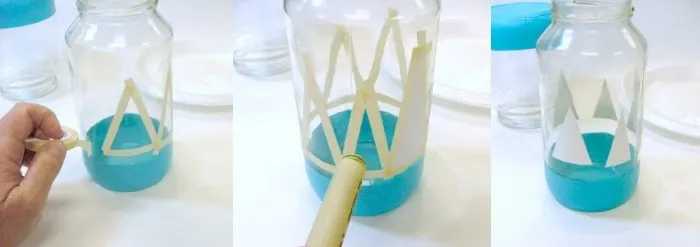
Tape off triangle shapes on another jar using ¼” tape. Apply Wicker White and remove tape.

Create large dots around the third jar with the largest sponsor in Forest Moss.
Paint details with a liner brush and create all dots using the opposite end of a paintbrush dipped in paint.
Your jars and candlesticks can be baked using the bottle instructions (don’t bake with the lids!!) or can be air dry-cured for a longer time.
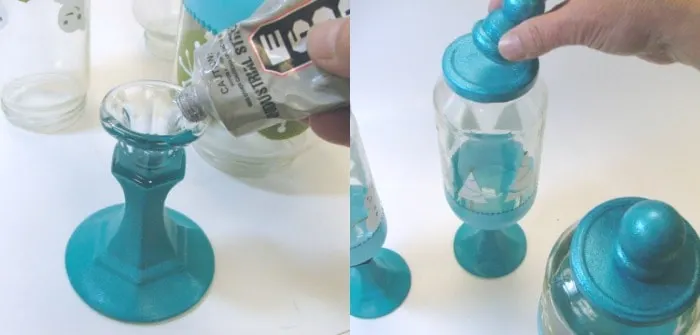
Apply E-6000 to the candlesticks and attach them to the bottom of the jars. Glue finials to jar lids with craft glue to finish.
- FolkArt Enamels Paint – Aqua, Calypso Sky, Forest Moss, Wicker White
- FolkArt Acrylic Paint – Calypso Sky
- FolkArt Extreme Glitter – Turquoise
- ¼”, ¾” stencil tape
- Craft glue
- E-6000
- Assorted wood knobs/balls/wagon wheels
- Glass candlesticks - 3
- Glass jars w/lids (recycled) - 3
- ¾”, 1 ¼”, 1 ¾” foam sponsors
- ¼”, ½” flat brush
- #1 Liner brush
- Clean all your glassware with mild soap and water or rubbing alcohol. Let dry.
- Apply Aqua enamels paint with the sponsor to the candlesticks. Set aside to dry.
- Glue your assorted wood pieces together to create three finials.
- Paint the finials and glass jar lids with Calypso Sky acrylic paint. Let the lids dry between coats.
- Apply several coats of Turquoise Extreme Glitter Paint to lids and finials. Let dry.
- Tape off an area of approximately 1 1/2" at the bottom of each jar using stencil tape.
- Apply several coats of Calypso Sky enamels paint with spencer. Remove tape before the paint dries.
- Create snowmen around one jar with assorted spencer sizes in Wicker White.
- Tape off triangle shapes on another jar using ¼” tape. Apply Wicker White and remove the tape.
- Create large dots around the third jar with the largest sponsor in Forest Moss.
- Paint details with a liner brush and create all dots using the opposite end of a paintbrush dipped in paint.
- Either bake or air dries the glass jars and candlesticks following instructions on the bottle.
- Apply E-6000 to the candlesticks and attach them to the bottom of the jars. Glue finials to jar lids with craft glue to finish. Let dry before using.